
The Turing Test: ML-Powered Language Understanding for Conversational Applications
mL, application

Baston Lodge Villa, Burton, St Leonards, Alan Turing’s childhood residence
In 1950, British mathematician Alan Turing proposed the Imitation Game, which has since become known as the Turing Test. The test hypothesizes that if a conversation is natural enough, it is impossible to tell whether you are conversing with a human or a computer.
As artificial intelligence (AI) continues to develop, conversational interactions with applications and digital assistants are becoming increasingly common. In some cases, these interactions can be indistinguishable from human-to-human conversations. Customer support applications, reservation systems and home automation are just a few examples of the many scenarios where this type of solution is used.
Conversational Language Understanding

To achieve the goal of the Turing Test, computers must be able to do more than simply accept language as input (either in text or audio format). They must also be able to interpret the semantic meaning of the input, or in other words, understand what is being said.
On Microsoft Azure, conversational language understanding is supported through the Language Service. To work with Conversational Language Understanding, you need to take into account three core concepts: utterances, entities and intents.
Utterances
An utterance is a unit of language that can be interpreted by a machine. It can be a sentence, a phrase, or even a single word. For example, the utterance "What is the weather like today?" is a question that can be understood by a machine.
Entities
An entity is a piece of information that is extracted from an utterance. For example, the entity "weather" is extracted from the utterance "What is the weather like today?" Entities can be names, places, dates, times, and so on.
Intents
An intent is the purpose of an utterance. For example, the intent of the utterance "What is the weather like today?" is to get information about the weather. Intents can be used to categorize utterances and to determine how to respond to them.
A Language Understanding application defines a model consisting of intents and entities. Utterances are used to train the model to identify the most likely intent and the entities to which it should be applied based on a given input.
Getting started with CLU
Creating an application with Conversational Language Understanding consists of two main tasks. First you must define entities, intents, and utterances with which to train the language model - referred to as authoring the model. Then you must publish the model so that client applications can use it for intent and entity prediction based on user input.
Azure Services
For each of the authoring and prediction tasks, you need a resource in your Azure subscription. You can use the following types of resource:
Language Service is a specialized resource that is designed for building applications that require industry-leading natural language understanding capabilities.
Cognitive Services is a general-purpose resource that includes Conversational Language Understanding along with many other cognitive services.
The separation of resources is useful when you want to track resource utilization for Language Service use separately from client applications using all Cognitive Services applications.
When your client application uses a Cognitive Services resource, you can manage access to all of the cognitive services being used, including the Language Service, through a single endpoint and key.
Authoring
CLU provides a comprehensive collection of prebuilt domains that include pre-defined intents and entities for common scenarios. You can use these as a starting point for your model, or you can create your own entities and intents.
When you create entities and intents, you can do so in any order. You can create an intent, and then select words in the sample utterances you define for it to create entities for them. Or, you can create the entities ahead of time and then map them to words in utterances as you're creating the intents.
You can write code to define the elements of your model, but in most cases it's easiest to use the Language Understanding portal, a web-based interface for creating and managing CLU applications.
Create intents
Intents are used to define the actions that a user can perform with your Azure application. Each intent is defined by a set of utterances that represent how a user might express that intent. The utterances should be as natural as possible, and they should cover a variety of possible ways that a user might express the intent.
Creating entities
There are four types of entities:
Machine-Learned: Entities that are learned by your model during training from context in the sample utterances you provide.
List: Entities that are defined as a hierarchy of lists and sublists. For example, a device list might include sublists for light and fan. For each list entry, you can specify synonyms, such as lamp for light.
RegEx: Entities that are defined as a regular expression that describes a pattern - for example, you might define a pattern like [0-9]{4}-[0-9]{4}-[0-9]{5} for telephone numbers of the form 5551-1234-45678.
Pattern.any: Entities that are used with patterns to define complex entities that may be hard to extract from sample utterances.
Training the model
Once you have established the intents and entities within your model, along with a suitable collection of example utterances, the subsequent phase involves training the model. The training process entails utilizing the provided sample utterances to instruct the model on how to identify and associate probable intents and entities with natural language expressions that a user may employ.
Once the model has undergone training, you can evaluate its performance by submitting text and examining the anticipated intents. Training and testing are recurrent procedures. Following the training phase, you test the model using sample utterances to verify the accurate recognition of intents and entities. If any discrepancies arise, you make necessary adjustments, retrain the model, and conduct further testing.
Predicting
Once you have attained a satisfactory outcome during the training and testing phase, you can proceed to deploy your Conversational Language Understanding application on a prediction resource for practical usage.
Client applications can easily access the model by establishing a connection with the prediction resource's endpoint and providing the required authentication key. By submitting user inputs, the client applications can acquire predictions for intents and entities. These predictions are then delivered back to the client application, enabling it to execute suitable actions based on the anticipated intent.
In this practical exercise, you will explore and evaluate the features of the Conversational Language Understanding service. To accomplish this, you will utilize a command-line application that operates within the Cloud Shell environment. The concepts and functionalities demonstrated here are equally applicable to real-world solutions, including websites and mobile applications.
Note. Please have in mind that in order to successfully complete this exercise, you will require an Azure subscription with administrative privileges.
As our reliance on technology grows, there is an increasing expectation for computers to leverage artificial intelligence (AI) in order to comprehend spoken or written commands expressed in natural language. For instance, one might envision implementing a home automation system that empowers users to control various devices within their household simply by issuing voice commands like "turn on the lights" or "activate the fan." Through the utilization of AI, these commands can be understood by intelligent devices, prompting them to take the appropriate actions accordingly.
To assess the capabilities of the Conversational Language Understanding service, we will employ a command-line application that operates within the Cloud Shell environment. It is worth noting that the principles and functionalities demonstrated in this exercise are equally applicable to real-world scenarios, including websites and mobile applications.
Create a Language service resource
You can use the Conversational Language Understanding service by creating a Language service resource. If you haven’t already done so, create a Language service resource in your Azure subscription.
1. In another browser tab, open the Azure portal at https://portal.azure.com, signing in with your Microsoft account.
2. Click the +Create a resource button, search for Language service, and create a Language service resource with the following settings:
Select additional features: Keep the default features and click Continue to create your resource
Subscription: Your Azure subscription.
Resource group: Select or create a resource group with a unique name.
Region: East US 2
Name: Enter a unique name.
Pricing tier: S (1K Calls per minute)
By checking this box I certify that I have reviewed and acknowledge the terms in the Responsible AI Notice.: Selected.
3. Review and create the resource, and wait for deployment to complete.
Create a Conversational Language Understanding App
To implement natural language understanding with Conversational Language Understanding, you create an app; and then add entities, intents, and utterances to define the commands you want the app to execute.
In a new browser tab, open the Language Studio portal at https://language.azure.com and sign in using the Microsoft account associated with your Azure subscription.
If prompted to choose a Language resource, select the following settings:
Azure directory: The Azure directory containing your subscription.
Azure subscription: Your Azure subscription.
Language resource: The Language resource you created previously.
Tip If you are not prompted to choose a language resource, it may be because you have multiple Language resources in your subscription; in which case:
On the bar at the top if the page, click the Settings (⚙) button.
On the Settings page, view the Resources tab.
Select your language resource, and click Switch resource.
At the top of the page, click Language Studio to return to the Language Studio home page.
3. At the top of the portal, in the Create new menu, select Conversational language understanding.
4. In the Create a project dialog box, on the Enter basic information page, enter the following details and click Next:
Name: Create a unique name
Description: Simple home automation
Utterances primary language: English
Enable multiple languages in project: Do not select

5. On the Review and finish page, click Create
To establish the functionality of your application, it is essential to create intents, utterances, and entities.
An intent represents the desired action to be performed. For instance, you may wish to illuminate a light or deactivate a fan. In this scenario, we will define two distinct intents: one for activating a device and another for deactivating it. To effectively define these intents, you will provide sample utterances that exemplify the language typically employed to express each intent.
To begin, navigate to the Schema definition pane and ensure that the Intents section is selected. Next, click on the "Add" button and proceed to create an intent named "switch_on" (in lowercase). Finally, click "Add intent" to finalize the creation process.

2. Select the switch_on intent. It will take you to the Data labeling page. In the Intent drop down, select switch_on. Next to the switch_on intent, type the utterance turn the light on and press Enter to submit this utterance to the list.

3. The language service needs at least five different utterance examples for each intent to sufficiently train the language model. Add five more utterance examples for the switch_on intent:
switch on the fan
put the fan on
put the light on
switch on the light
turn the fan on
4. On the Labeling entities for training pane on the right-hand side of the screen, select Labels, then select Add entity. Type device (in lower-case), select List and select Add entity.


5. In the turn the fan on utterance, highlight the word “fan”. Then in the list that appears, in the Search for an entity box select device.

6. Do the same for all the utterances. Label the rest of the fan or light utterances with the device entity. When you’re finished, verify that you have the following utterances and make sure to select Save changes:

7. In the pane on the left, click Schema definition and verify that your switch_on intent is listed. Then click Add and add a new intent with the name switch_off (in lower-case).

8. Click on the switch_off intent. It will take you to the Data labeling page. In the Intent drop down, select switch_off. Next to the switch_off intent, add the utterance turn the light off.
9. Add five more utterance examples to the switch_off intent.
switch off the fan
put the fan off
put the light off
turn off the light
switch the fan off
9. Label the words light or fan with the device entity. When you’re finished, verify that you have the following utterances and make sure to select Save changes:

Train the model
Now you’re ready to use the intents and entities you have defined to train the conversational language model for your app.
On the left hand side of Language Studio, select Training jobs, then select Start a training job. Use the following settings:
Train a new model: Selected and choose a model name
Training mode: Standard training (free)
Data Splitting: select Automatically split the testing set from the training data, keep default percentages
Click Train at the bottom of the page.
Wait for training to complete.
Deploy and test the model
To use your trained model in a client application, you must deploy it as an endpoint to which the client applications can send new utterances; from which intents and entities will be predicted.
On the left-hand side of Language Studio, click Deploying a model.
Select your model name and click Add deployment. Use these settings:
Create or select an existing deployment name: Select create a new deployment name. Add a unique name.
Assign trained model to your deployment name: Select the name of the trained model.
Click Deploy
Tip. Write down your deployment name, you will use it later.
When the model is deployed, click Testing deployments on the left-hand side of the page, and then select your deployed model under Deployment name.
Enter the following text, and then select Run the test:
switch the light on

After receiving the result, take a moment to carefully examine its contents, paying particular attention to the predicted intent, which should ideally be "switch_on," and the predicted entity, which pertains to the device being referred to. Both the predicted intent and entity will be accompanied by confidence scores, indicating the probability calculated by the model for each.
To gain a better understanding of the confidence scores, refer to the JSON tab. It provides a comprehensive overview of the confidence levels associated with each potential intent. The intent with the highest confidence score will correspond to the predicted intent, reflecting the model's most likely interpretation.
5. Clear the text box and test the model with the following utterances under Enter your own text, or upload a text document:
turn off the fan
put the light on
put the fan off
Run Cloud Shell
Now let’s try out your deployed model. To do so, we’ll use a command-line application that runs in the Cloud Shell on Azure.
Leaving the browser tab with Language Studio open, switch back to browser tab containing the Azure portal.
In the Azure portal, select the [>_] (Cloud Shell) button at the top of the page to the right of the search box. Clicking the button opens a Cloud Shell pane at the bottom of the portal.

3. The first time you open the Cloud Shell, you may be prompted to choose the type of shell you want to use (Bash or PowerShell). Select PowerShell. If you do not see this option, skip the step.
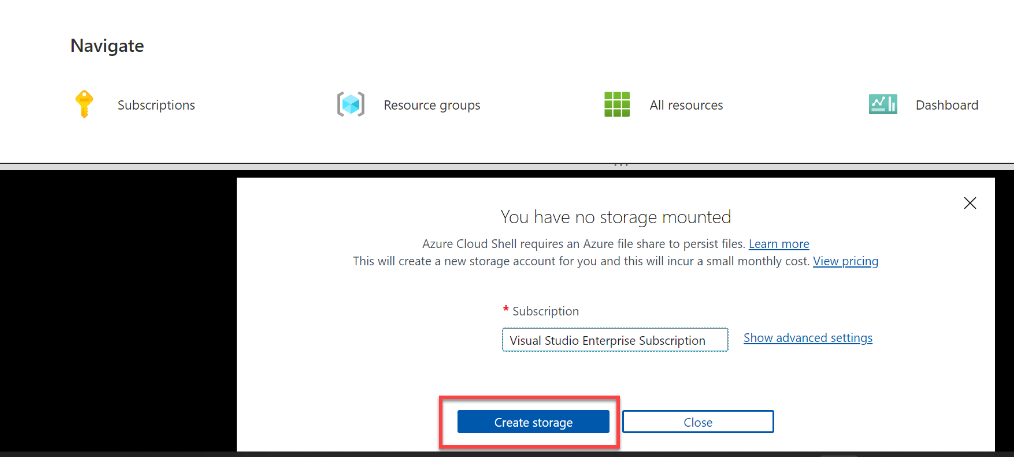
4. If you are prompted to create storage for your Cloud Shell, ensure your subscription is specified and select Create storage. Then wait a minute or so for the storage to be created.
5. Make sure the type of shell indicated on the top left of the Cloud Shell pane is switched to PowerShell. If it is Bash, switch to PowerShell by using the drop-down menu.

6. Wait for PowerShell to start. You should see the following screen in the Azure portal:

Configure and run a client application
Now let’s open and edit a pre-written script, which will run the client application.
In the command shell, enter the following command to download the sample application and save it to a folder called ai-900.
Copy this code:
 git clone https://github.com/MicrosoftLearning/AI-900-AIFundamentals ai-900

Note If you already used this command in another lab to clone the ai-900 repository, you can skip this step.
The files are downloaded to a folder named ai-900. Now we want to see all of the files in this folder and work with them. Type the following commands into the shell:
Copy this code:
 cd ai-900
 code .
Notice how the script opens up an editor like the one in the image below:

3. In the Files pane on the left, select the understand.ps1 file in the ai-900 folder. This file contains some code that uses your Conversational Language Understanding model.

Don’t worry too much about the details of the code. The important thing is that you’ll use the instructions below to modify the file to specify the language model you trained.
4. Switch back to the browser tab containing Language Studio. Then in Language Studio, open the Deploying a model page and select your model. Then click the Get prediction URL button. The two pieces of information you need are in this dialog box:
The endpoint for your model - you can copy the endpoint from the Prediction URL box.
The key for your model - the key is in the Sample request as the value for the Ocp-Apim-Subscription-Key parameter, and looks similar to 0ab1c23de4f56gh7i8901234jkl567m8.
5. Copy the endpoint value, then switch back to the browser tab containing the Cloud Shell and paste it into the code editor, replacing YOUR_ENDPOINT (within the quotation marks). The repeat that process for the key, replacing YOUR_KEY.
6. Next, replace YOUR_PROJECT_NAME with the name of your project, and replace YOUR_DEPLOYMENT_NAME with the name of your deployed model. The first lines of code should look similar to what you see below:
Copy this code:
 $endpointUrl="https://some-name.cognitiveservices.azure.com/language/..."
 $key = "0ab1c23de4f56gh7i8901234jkl567m8"
 $projectName = "name"
 $deploymentName = "name"
7. At the top right of the editor pane, use the … button to open the menu and select Save to save your changes. Then open the menu again and select Close Editor.
8. In the PowerShell pane, enter the following command to run the code:
Copy this code:
./understand.ps1 "Turn on the light"9. Review the results. The app should have predicted that the intended action is to switch on the light.
10. Now try another command:
Copy this code:
./understand.ps1 "Switch the fan off"11. Review the results from this command. The app should have predicted that the intended action is to switch off the fan.
12. Experiment with a few more commands; including commands that the model was not trained to support, such as “Hello” or “switch on the oven”. The app should generally understand commands for which its language model is defined, and fail gracefully for other input.
Note. Each time you will need to start with ./understand.ps1 followed by the phrase. Include quotation marks around your phrase.


AI Factories are redefining industry — where data becomes intelligence, and automation drives the Fourth Industrial Revolution.